I'm done! I am so happy to have all of my Christmas cards in the mail and I love the way they turned out. I didn't have to buy any new materials (aside from the postage and photo prints) and got to use some supplies that I really love. Hooray! They were done on December 1st but it took me a few days to get photos.
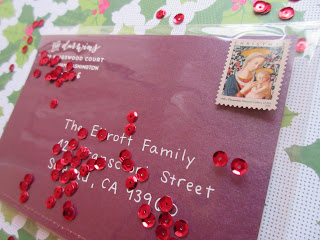
I wanted to use clear envelopes without mailing labels, so I needed to address the dark purple metallic paper that was the card backing. Originally, I tried using copper ink and pens to tie in with the copper metallic thread I used, but the white stood out much better.
The return address was stamped with Hero Arts Unicorn White Pigment Ink and then embossed with WOW Super Fine White Embossing Powder. I had to learn the hard way that the white pigment ink never dried on the metallic paper.
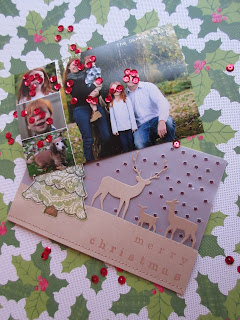
My Christmas cards evolved a bit from the sketch I made a few months back. After I started die-cutting all the layers and did a test version, I streamlined the process and was able to eliminate one layer by sewing along the bottom to hold the photo in place.
There are three layers of paper sewn together using my trusty Janome sewing machine: metallic backing, vellum die cut with falling stars, and a kraft layer with the die cut deer family. The photo just slid in between the vellum and backing so you can see it in the clear envelope and the recipient can remove it at any time.
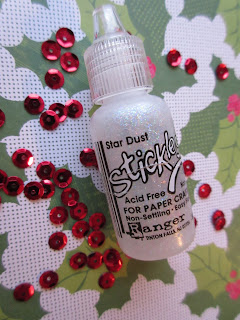
I judged this project as a success because I managed to finish off an entire bottle of Stickles in the process. Merry Christmas to all!
Update 12.9.2016
I have had three cards returned to me, but lots of people saying they arrived just fine. The first two returned looked as if they had gotten stuck in the USPS equipmet. But the card today was perfectly fine and had gone all the way to California and then returned. Apparently the plastic envelopes are on the postal service's naughty list.
Supplies:
die cuts - Memory Box "Deer Trio" | Simon Says Stamp "Falling Stars"
paper - Stardream "Ruby" metallic paper | glitter vellum | Neenah "Desert Storm" paper | Basic Grey "Wreath" patterned paper
glitter - Stickles "Star Dust"
stamps - Lawn Fawn "Trim the Tree" | Martha Stewart "Serif" alphabet | custom return address from Etsy
ink - Hero Arts "Unicorn" | Memento "Cosmic Copper" | Memento "Tuxedo Black"
embossing - EK Success powder tool | WOW Super Fine White Embossing Powder
pens - white Sakura Gelly Roll | Copic marker (tree trunk)
other - Coats Metallic "Copper" thread | crystal clear envelope


Comments
Thank you for sharing with us at Simon Says Stamp Wednesday Challenge X