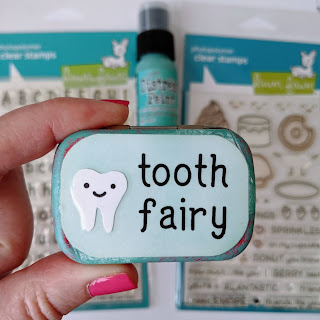
This is one of my favorite projects I've finished recently! My son needed a safe spot to keep lost teeth until the tooth fairy arrived. And we just happened to have the perfect tin to upcycle. It is featured on the Scrapbookpal.com blog.
Step 1: Wash and dry a mini Altoids tin.
Step 2: Use a paint dauber and some acrylic craft paint to cover the logo and nutrition facts on the tin.
Step 3: Cut a small piece of cardstock to cover the top of the tin and round the corners (any color except white, so the tooth will stand out).
Step 4: Use Lawn Fawn's Claire's ABCs stamp set to stamp "tooth fairy" on the right side of the cardstock.
Step 5: Cut a tooth shape from white cardstock. I looked at some clip art online for reference.
Step 6: Use Lawn Fawn's Sweet Friends stamp set to stamp a cute face on the tooth, and adhere the tooth to the left side of the cardstock.
Step 7: To make this a bit more durable you can laminate the piece of cardstock or cover it with clear packing tape.
Step 8: Once the paint on the tin is dry, you can use really strong adhesive tape (Scor-Tape) to stick the cardstock to the top of the tin.
Step 9: Adding a piece of felt to the inside makes a nice resting spot for a tooth.
Supplies:
Mini Altoids tin (washed and dried)
Lawn Fawn Claire's ABCs clear stamps
Lawn Fawn Sweet Friends clear stamps
cardstock
black ink
Distress Paint (or acrylic paint and sponge dauber)
small piece of felt


Comments