I am at least 10 hours into my Christmas card making this year and I have learned a few lessons along the way. Hopefully it can help someone else in their quest to make a million cards in a short amount of time.
stamping with multiple ink colors
I wanted to use a new mini stamp set from Papertrey Ink this year, called Peace, Love, and Joy. And I wanted to be able to use more than one ink color to tie everything together for my cards. So this is how I did it - quick and super easy with clear stamps!
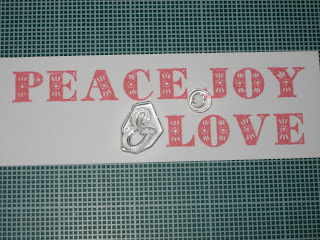
First I laid out the bulk of my message, lining up the stamps on my cutting mat with a grid to get them straight, and then pressing my clear block on top. I used this block to stamp the message with pink ink 40 times.
Then I took one of the stamped images and lined up the rest of the stamps I was going to use.
Once they were perfectly placed I pressed the clear block on top and had everything lined up.
Then I used this block to stamp in green on the 40 strips that had already been stamped.
This saved me time because I didn't have to stamp the comma, and then go back and stamp the ampersand on each one.
background stamps
I have a love/hate relationship with background stamps. I love the images, and I am always amazed by how crisp and clear Jennifer McGuire is able to imprint background stamps on her cards. Especially her embossing. But every time I try to use one I end up hating the result. And for some crazy reason I thought I should use one on my cards this year in order to "save" time instead of running embossing plates through my Cuttlebug 80 times (2 designs for 40 cards).
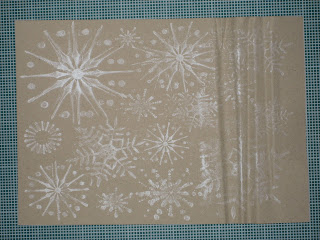
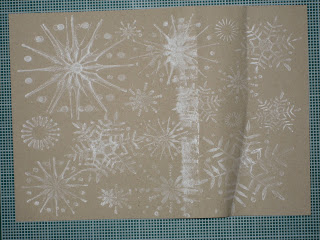
After stamping about 10 backgrounds (with the stamp laying up on the table and me pressing the cardstock onto each and every square inch of it), I decided maybe I should try running it through my Cuttlebug to see if it would do the hard work for me. Turns out the Hero Arts background stamp is about a half millimeter too big and this was the result:
 |
| Running the background stamp through the Cuttlebug with just this thin cardstock on the bottom. Result is smeared and the paper got stuck in the roller at the end. |
 |
| This time I added one more sheet of cardstock to the bottom, thinking it would help get everything through the rollers. The result was even more seared and it still got stuck. |
 |
| This is the image quality when I take about 30 seconds to press down every nook and cranny with my fingers. Still not perfect... |
Lesson learned - I should have stuck with the embossing plates idea because the background stamps are not for me! I did read somewhere that standing on top of the background stamp gives a nice even impression. But I wasn't about to do that for 40 cards. And I still think this would have worked with the Cuttlebug if there had been room for an 'A' plate at the bottom of the sandwich.
Hope this helps! Let me know if you have any tips for the background stamps.


Comments
As for background stamps, I've seen people ink up the stamp with the stamp resting on a table. Then they put their cardstock on top of that and use a brayer to roll over it so that every inch of cardstock is pressed down onto the inked stamp.